


Introduction to Firebase
Prerequisites
- Basics of HTML, CSS and JavaScript.
- Understanding how event listeners works in JavaScript.
- We need to have Node installed on our machine.
- We do not need to have any knowledge about Firebase or it’s tools.
Tools Required
- Text Editor (Sublime, VsCode, Atom etc.), I will be using VsCode, you can download here: https://code.visualstudio.com/download
- Firebase CLI: https://firebase.google.com/docs/cli
- Firebase Console: https://console.firebase.google.com/
In this course we will need some knowledge of HTML, CSS and JavaScript .
We will not be treating those Prerequisites here but you can follow the link to learn
and get back to complete this article.
Introduction
For a collection of quick-start samples demonstrating how Firebase APIs uses the JavaScript SDK, you can check here
Firebase is a mobile and web app development platform that provides developers with a whole set of tools and services to help them develop top notch apps and earn more profit.
What is great about Firebase :
- It’s database is No-SQL database.
- It takes a lot of work out of our hands so we can focus on front-end.
- It’s completely managed scaled by Google, you don’t have to worry about your code breaking in production.
- You can use the Firebase SDK to communicate to the database and worry less about server-side code.
Now we know what Firebase is, we can start by building out front-end.
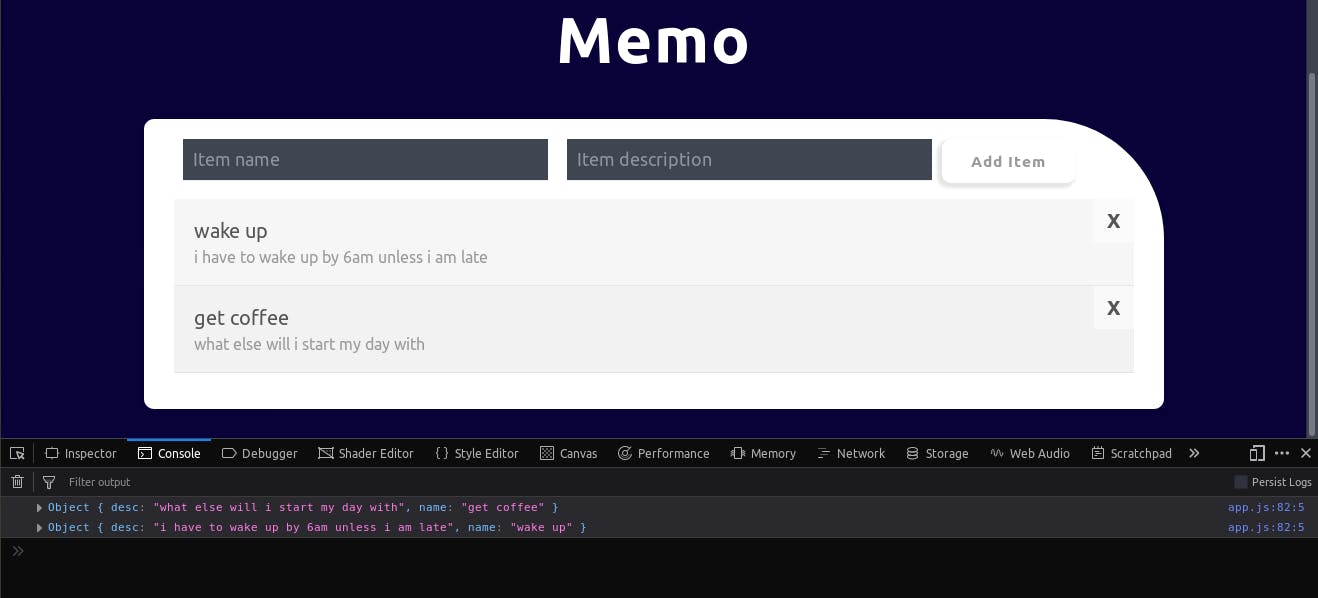
What we’re building.
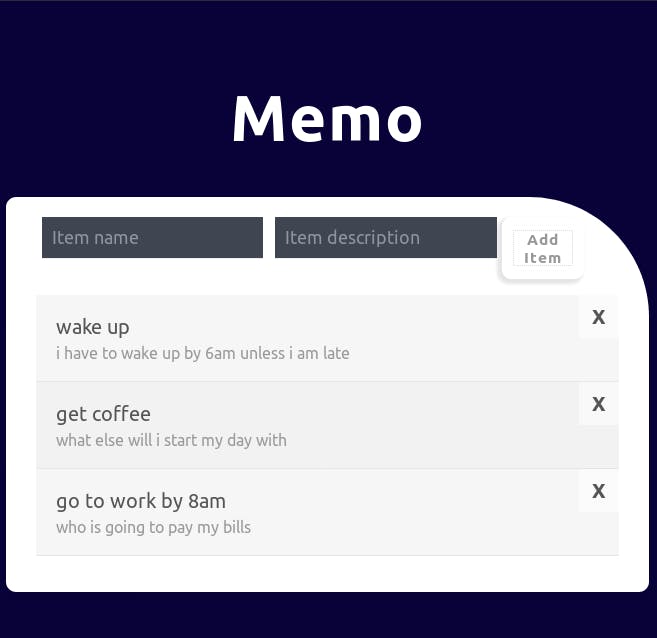
We are building a memo web app, with real-time interaction with Firebase database, we will be able to add and delete items to the app.
Our finished project will look like this :
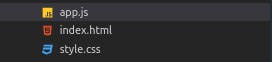
Create a folder and inside it, create three files like so :
Create three files like these :
- index.html
- style.css
- app.js
Create a file structure like this :
In the index.html file add this :
<html>
<head>
<link rel="stylesheet" href="styles.css">
</head>
<body>
<h1>Memo</h1>
<div class="content">
<form id="add-memo-form"></form>
<ul id="memo-list"></ul>
<div>
<script src="app.js"></script>
</body>
</html>
This above is linking our style-sheet in the head tag, everything is going to be rendered in the div with a class of content, and lastly is our link to the app.js file where all the magic happens.
Click here to clone the starter code for this article.
Setting up
Back to the topic of today’s course, go to Firebase console by clicking here.
You will be required to create a new account or login to one of your gmail accounts, Next we go to https://console.firebase.google.com/
Click on GO TO CONSOLE on the top right side of your screen and it will take you to the Firebase console.
Next,
- We will click on Add project to create a new project for this article.
- Then we will give it a name, let’s call it firebase-memo.
- Then select your region.
- At this point we should be able to create our project.
It’s going to take a few seconds to create so we wait till it’s all done.
On this article we will focus on the Firebase database which is known as Cloud Firestore.
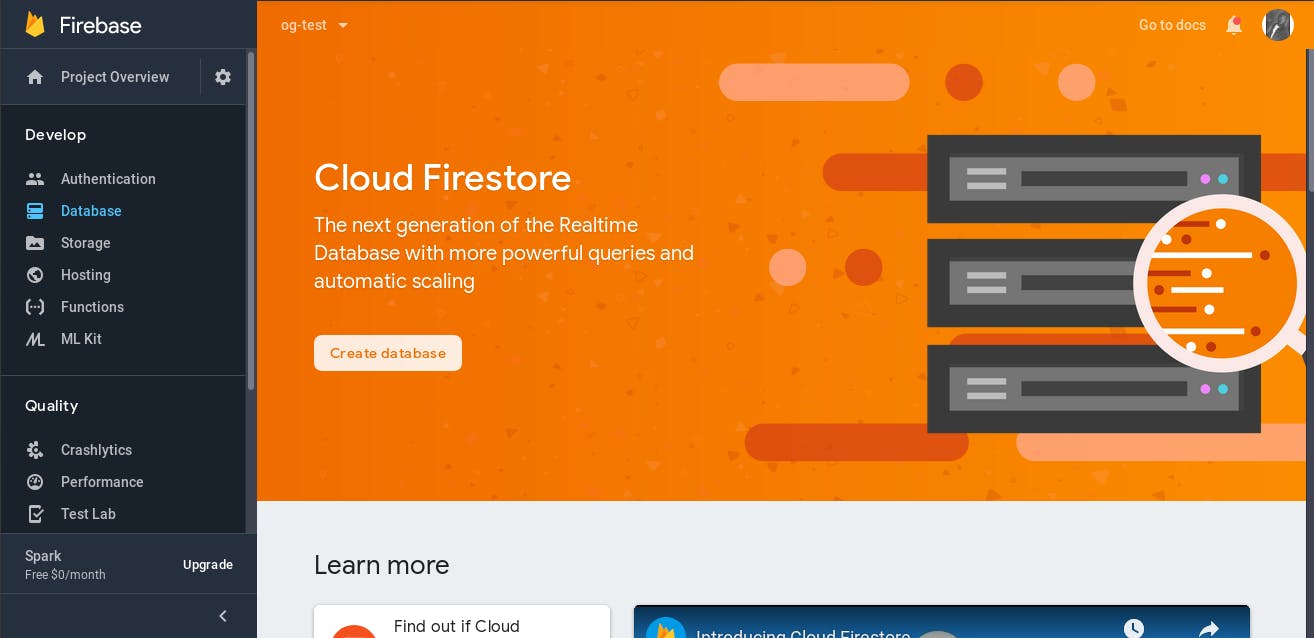
Click on Create database
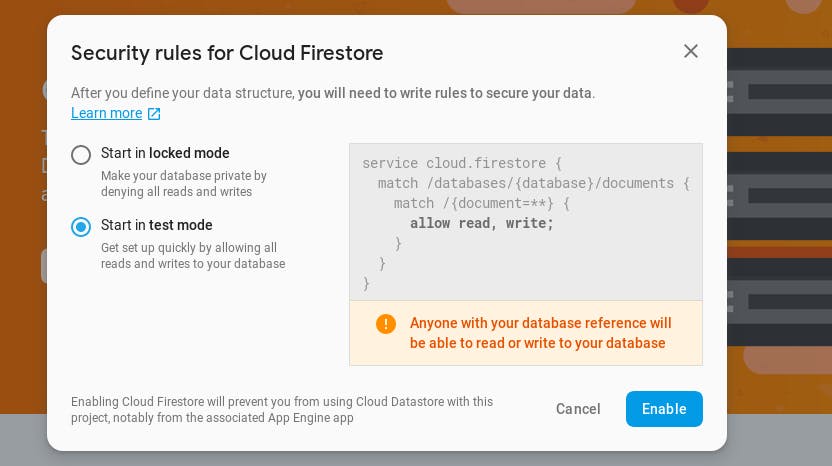
Security rules for Cloud Firestore here are important. If you pick the locked mode we won’t be able to read or write to the database without setting up our authentication first but since our app won’t require a user to login we will go for the test mode.
When it is done creating we should see this in our screen.
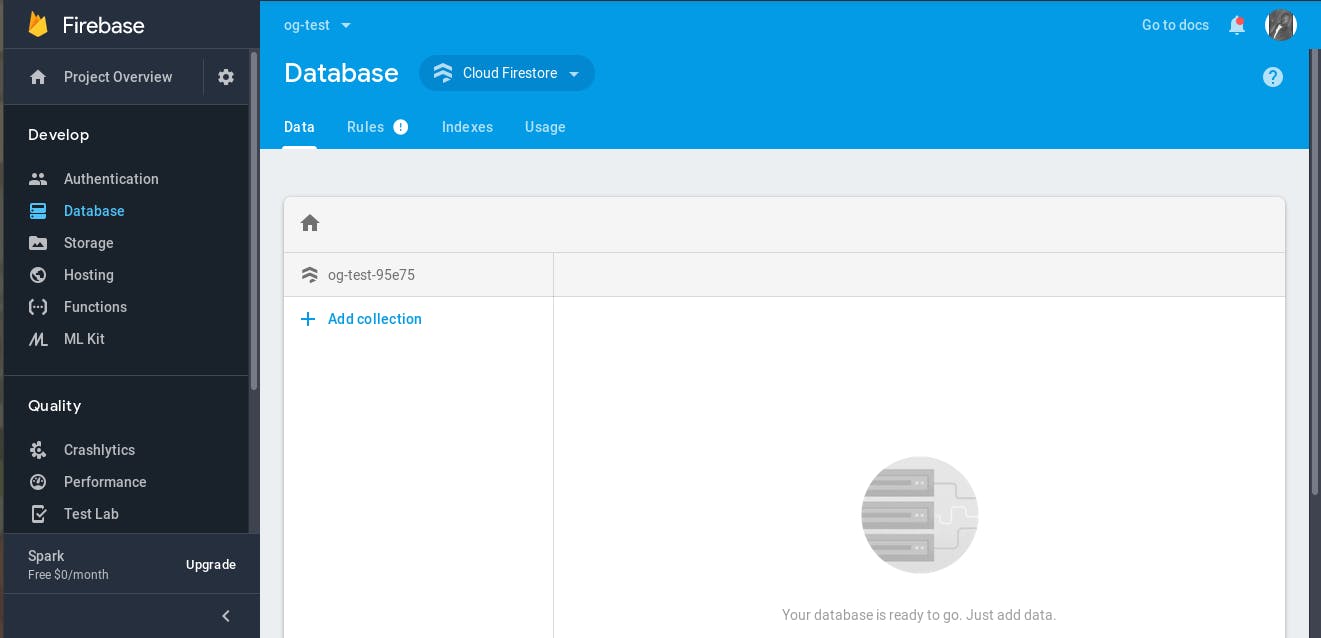
So let’s create a new collection by clicking the Add collection button and call it memo, next up
it will ask us to store our first document(s).
I like to leave the ID in Auto-ID and allow Firebase handle it for me.
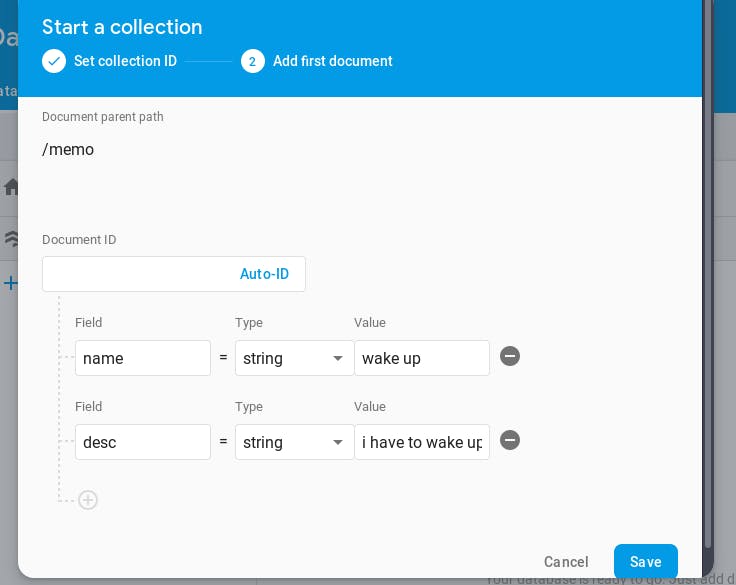
We can create multiple collections but will be using only one in this article. We should see this at this point :

From the left is the collection, moving over to the middle section is that pile of string there looking like KDwz6FpsHhm8HaFwWHBA. This is a unique identifier of that particular document that was just created. It will varies so it will not be the same with mine. Lastly on the right is the document fields with it’s data.
Now we want to be adding this data from front-end in our application, so let’s go to our Project.
Overview at the top left of your console, under the Firebase Logo and click on it. This what we should see
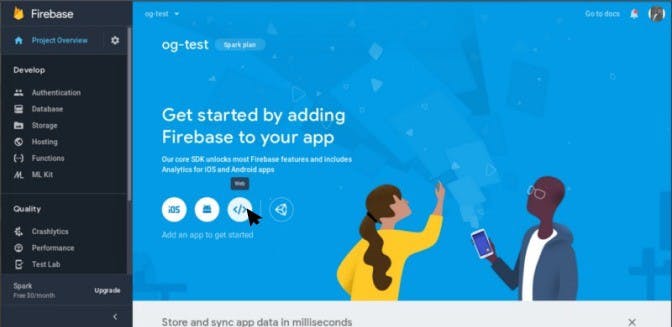
When you click on the web icon we should see something like this :
<script>
// Initialize Firebase
var config = {
 apiKey: "xxxxxxxxxxxxxxxxxxxxxxxxxxx",
 authDomain: "xxxxxxxxxxx.firebaseapp.com",
 databaseURL: "https://xxxxxxx.firebaseio.com",
 projectId: "xxxxxxxx",
 storageBucket: "xxxxxxxx.appspot.com",
 messagingSenderId: "xxxxxxxxxxxxx"
};
firebase.initializeApp(config);
</script>
Copy it and paste it in the index.html file before the closing body tag, Firebase needs all of this stuff so it knows how we are connecting to it.
<script src="https://www.gstatic.com/firebasejs/5.11.0/firebase.js"></script>
Usually, with this import, Firebase loads everything, but since we don’t need that, we will use the import below.
<script src="https://www.gstatic.com/firebasejs/5.11.0/firebase-app.js"></script>
<script src="https://www.gstatic.com/firebasejs/5.11.0/firebase-firestore.js"></script>
Copy and paste this in the head tag, so this is loading the core app library and Firestore which is just what we are using in the app from Firebase.
<script>
// Initialize Firebase
var config = {
 apiKey: "xxxxxxxxxxxxxxxxxxxxxxxxxxx",
 authDomain: "xxxxxxxxxxx.firebaseapp.com",
 databaseURL: "https://xxxxxxx.firebaseio.com",
 projectId: "xxxxxxxx",
 storageBucket: "xxxxxxxx.appspot.com",
 messagingSenderId: "xxxxxxxxxxxxx"
};
firebase.initializeApp(config);
const db = firebase.firestore();
</script>
We are adding that line of code so it will help us when we want to query the database in the future.
So now we are set up and ready to start working with Firebase.
Writing Firebase Cloud functions.
Now we are done with HTML and styling, We will be writing our Firestore Cloud function in the app.js file.
Fun fact — Firebase Cloud functions are asynchronous and that means it awaits a promise before execution and with this we have to be careful the way we get and post data.
db.collection('memo').get().then((snapshot) => {
 console.log(snapshot.docs);
});
Copy and paste this code above, save and refresh the app, if you added collection and gave it document some data as showed in diagram 6 , you will have this response in your browser console
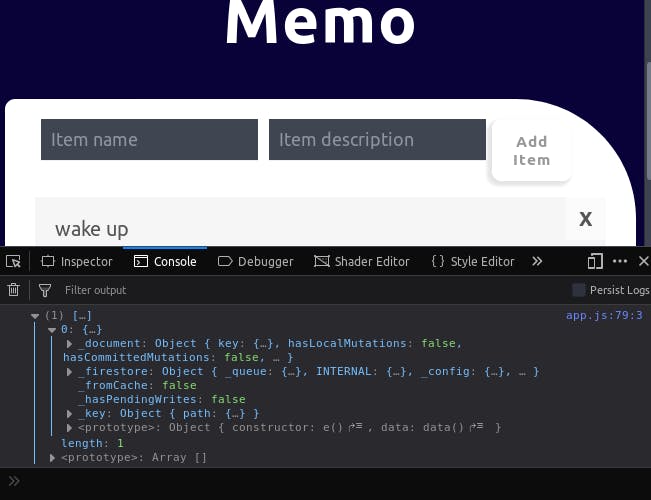
It is having a length of 1 because we have only one document in the collection.
If you noticed we can not see the data that we inputted,
We use get() method to retrieve data from Firestore.
To view documents we will have to use the data() method, Copy this and replace with what is in app.js.
db.collection('memo').get().then((snapshot) => {
 console.log(snapshot.docs);
 snapshot.docs.forEach(doc => {
  console.log(doc.data())
 })
});
We should see each document like so :
I know you must be wondering how i got to display the documents on the front-end

Let’s work through it now.
First things first we have to create that part of the front-end that will display the documents and it has to be dynamic. so we are going to do the infamous CSS in JavaScript thingy

In our app.js add this code :
const memoList = document.querySelector("#memo-list");
const form = document.querySelector("#add-memo-form");
//this is where we grab the form, fill in data into the form.
//listen for a submit event and then fire off the data to firestore.
function renderMemo(doc) {
 //diff elements
 let li = document.createElement("li");
 let name = document.createElement("span");
 let desc = document.createElement("span");
 let cross = document.createElement("div");
 let edit = document.createElement("span");
// This line of code below attaches "data-id" to add the Auto ID   firebase will generate.
// we are doing this so that in future we can easily get a particular doc and manipulate it.
 li.setAttribute("data-id", doc.id);
 name.textContent = doc.data().name;
 desc.textContent = doc.data().desc;
 cross.textContent = "X";
 li.appendChild(name);
 li.appendChild(desc);
 li.appendChild(cross);
 memoList.appendChild(li);
}
All the code below will be in the app.js file
Let’s not forget that because we did this
const db = firebase.firestore();
We can now use this constant db in our app.js and we will be referring to our Firestore.
Saving data function
//saving data
form.addEventListener("submit", e => {
 e.preventDefault();
 db.collection("memo").add({
  name: form.name.value,
  desc: form.desc.value
 });
 form.name.value = "";
 form.desc.value = "";
});
What this is doing is getting data from the form on the front-end and sending it to Firestore, preventing default form behaviors, Because we don’t want that and finally setting the form value to an empty string after each POST to Firestore, So that we can easily add a new one if we still want.
Don’t forget we use the add() method to add document(s) to Firestore collection.
Deleting data function
const memoList = document.querySelector("#memo-list");
const form = document.querySelector("#add-memo-form");
//this is where we grab the form, fill in data into the form.
//listen for a submit event and then fire off the data to firestore
function renderMemo(doc) {
 let li = document.createElement("li");
 let name = document.createElement("span");
 let desc = document.createElement("span");
 let cross = document.createElement("div");
 let edit = document.createElement("span");
 li.setAttribute("data-id", doc.id);
 name.textContent = doc.data().name;
 desc.textContent = doc.data().desc;
 cross.textContent = "X";
 li.appendChild(name);
 li.appendChild(desc);
 li.appendChild(cross);
 memoList.appendChild(li);
// deleting data
cross.addEventListener("click", e => {
 e.stopPropagation();
 let id = e.target.parentElement.getAttribute("data-id");
//find a doc on the dom
 db.collection("memo")
 .doc(id)
 .delete();
 });
}
The additional code in highlight is a function for deleting a document through the front-end.
It will listen to an Onclick event on the X sign on the front-end and fire off this function.
It gets the ID of the particular document and deletes it from Firestore.
We use delete() method to delete documents.
Real-time data listener and Order query
//  real time listener
db.collection("memo")
.orderBy("desc")
.onSnapshot(snapshot => {
// We also rendered data in real-time using
 let changes = snapshot.docChanges();
 changes.forEach(change => {
  if (change.type == "added") {
  renderMemo(change.doc);
 } else if (change.type == "removed") {
 let li = memoList.querySelector("[data-id=" + change.doc.id + "]");
 memoList.removeChild(li);
  }
 });
});
We use the orderBy() or where() methods to query Firestore to display data according to the rules set in those Queries, get more information here.
Deploying with Firebase
Now we have come to the end of the article, Since Firebase gives us the option to host our apps with them all for free, we will host our app.
- Get Node installed on your local machine.
- Install the Firebase CLI using npm by running:
$ npm install -g firebase-tools
- Sign into Firebase using your Google account by running:
$ firebase login
- To test that authentication worked (and to list all of your Firebase projects), run the following command:
$ firebase list
The displayed list should be the same as the Firebase projects listed in your Firebase console
Now you have Firebase CLI installed.
- Copy your index.html, style.css and app.js file into the public folder
- Change directory to the root folder of our Firebase project and run:
$ firebase init
- Select Database, Firestore and Hosting and Storage, use your arrow key to navigate, hit space-bar when the cursor is on those options, hit enter when you are done.
You will have some questions from Firebase
- What do you want to use as your public directory? public
Hit enter.
- Configure as a single-page app (rewrite all urls to /index.html)? (y/N)
Type N
- Run this :
$ firebase deploy
When it finishes you should see the URL of our Firebase Memo app.
Conclusion
We built a memo app using vanilla JavaScript and Firebase.
We now understand what Firebase is, how we can use Firestore and it’s methods.
Here is the full code. feel free to send a Pull request.
Thanks for reading
Hope this helps you get started with Firebase — You could tweet at me any question here : https://twitter.com/Godswillokokon or via Email : Godswillokokon3@gmail.com